20 Dinosaur Activities for Preschoolers (2026)
Looking for dinosaur activities for preschoolers?
I have 20 EXCITING dinosaur-themed crafts and activities that are perfect to do in the classroom or at home with your preschoolers!
#19 is my favorite; make sure to take a look! Let’s get started!
Activity #1: Walking Dinosaur Paper Plates
I love crafts that the kids can play with after they are done making them. It makes the activity more exciting for them!
This paper plate dinosaur craft is the perfect dinosaur activity for preschoolers because they can walk!

How to do this activity
A. Materials you need
- paper plates
- TP rolls
- acrylic paint
- toy dinosaurs
- cardstock paper
- googly eyes
- washable paint

B. Set-up
Cut a paper plate in half and paint them the colors you want! Also, cut a TP roll in half and paint them the same colors as the dinosaurs.
Create a head and tail for the dinosaurs! If you are making a stegosaurus, you’ll make the head small, and the brachiosaurs neck will be long!
C. Activity
Make small boney plates for the stegosaurs using white card stock. Have the kids create dinosaur prints using their toy dinosaurs with paint on the plates!
You can also have the kids make prints on the dinosaur’s body to add some extra color!
Make two small cuts on both sides of the TP roll so they can fit on the paper plate to walk!
Activity #2: Dinosaur Oobleck Sensory
This dinosaur activity for preschoolers is a fun sensory play activity.
There is a land section and a water section for this sensory bin. When you add water into the mix, the kids always enjoy it. I’m also not kidding when I say that I had to set up the blue water set up for my son for weeks straight after this activity.

How to do this activity
A. Materials you need
- sensory bins
- cornstarch
- water
- food coloring
- fake grass
- toy dinosaurs

Want 15% off your order at Safari LTD. Use the code ABCDEE at checkout
B. Set-up
To create oobleck, you mix two cups of cornstarch and 1 cup of water. Add in A LOT of brown food coloring. To get it to look brown, I had to add many drops of brown food coloring.
It won’t stain their hands!
Add the oobleck and the fake grass in one sensory bin and add some water with a few drops of blue food coloring in another bin.

C. Activity
Let the kids explore the dinosaur’s habitats! If you have different types of dinosaur toys, you can have them separate which dinosaurs would be in the water and land.
They can cover them up in the oobleck and then give them a bath in the water too!
RELATED: BEST Sensory Bins for Kids
Activity #3: Track Painting
Creating dinosaur tracks is the perfect dinosaur activity for preschoolers! It’s simple and a fun way for them to create some process art.
Your toddlers can compare the sizes of the dinosaur prints and have a blast creating art with their dinosaurs.

How to do this activity
A. Materials you need
- easel paper
- washable paint
- dinosaurs
- tape
- art tray

B. Set-up
Roll out a piece of easel paper and tape it to the floor so the sides won’t come up.
Pour out some paint on an art tray!
C. Activity
Dip the dinosaurs’ feet into the paint and place them on the paper! Make several prints with each dinosaur like they are walking.
Do this with each dinosaur and use different colors to show the differences between the tracks. Discuss the differences!
RELATED: Kindergarten Activities for Kids
Activity #4: Fizzy Dinosaur Eggs
Preschoolers love surprises, don’t they? These fizzy dinosaur eggs are such a hit because, inside each little egg, there is a mini dinosaur!
Fizzy experiments are always so much fun. The kids love watching the eruption happen!

How to do this activity
A. Materials you need
- baking soda
- water
- food coloring
- mini dinosaurs
- bowls
- vinegar
- droppers
- sensory bin

B. Set-up
In each bowl, pour 1/2 cup of baking soda, 2 teaspoons of water, and 1-2 drops of food coloring.
Mix each bowl up. It should be crumbly! If it’s too wet, it won’t form into an egg shape. Add more baking soda if this happens.
Put a little of the mix in your hands and add in the dinosaur. Cover up the dinosaur with the remaining baking soda mix!

C. Activity
*Place the eggs in the freezer for 15 minutes before starting the activity!*
When ready, put the eggs into a sensory bin. Get some droppers or squirt bottles for the kids to squirt the vinegar.
Let the kids have a blast watching the fizzy eggs, and their little dinosaurs appear!
Activity #5: Dinosaur Ice Eggs
We love rescuing toy activities! The kids get so excited to be able to release their animals from being trapped!
This dinosaur activity for preschoolers is fun anything throughout the year!

How to do this activity
A. Materials you need
- circle ice molds
- small dinosaurs
- squirt bottles
- salt
- warm water
- sensory bin

B. Set-up
Place a small dinosaur in a circle ice mold and place it in the freezer overnight!
C. Activity
Fill up some squirt bottles with warm water. Place the eggs in a sensory bin!
Have the kids use the squirt bottles full of warm water to release their dinosaur toys! See how long it takes them to free each dinosaur.

RELATED: Outdoor Activities for Kids
Activity #6: Salt Dough Fossils
Salt dough activities couldn’t be easier, and they turn out so cool!
Your preschooler will love playing with their DIY dinosaur fossils for pretend play or in a sensory bin.

How to do this activity
A. Recipe
- 2 cups of wheat or regular flour
- 1 cup of salt
- 1 cup of warm water
- dinosaur toys
- mixer
- skeleton dinosaurs
- baking tray
- parchment paper

B. Set-up
Mix the water, salt, and water to make the salt dough. You can use a spoon to mix, but I suggest using a hand mixer to do this step!
Make a small ball and flatten it with your hand!
C. Activity
Press the dinosaur toy or skeleton gently into the dough, then lift it slowly to see the impression.
Place all your fossils on a baking sheet and place them in the oven at 250F for 1-2 hours.
Remove once they are hard and play! You can add these in a sand bin so the kids can reveal them with paintbrushes like real paleontologists!
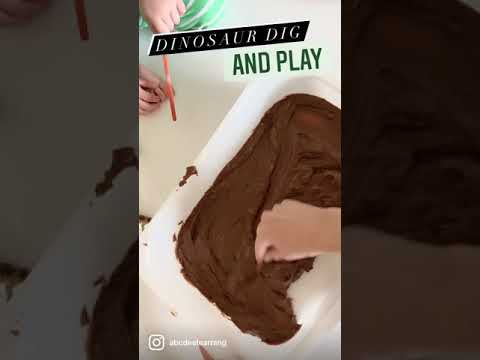
Activity #7: Dinosaur Sensory
I have a sensory bin that includes two sensory set-ups! But don’t worry, the prep isn’t more time-consuming at all!
This is a sensory bin of “mud” and sand for the kids to dig and play!
How to do this activity
A. Materials you need
- pudding
- sensory bins
- flour
- vegetable oil
- dinosaurs
- skeleton dinos
- paintbrushes

B. Set-up
Make the pudding by following the directions on the box! Scoop it into a sensory bin.
To make the cloud dough “sand,” add 8 cups of flour in a sensory bin along with 1.5 cups of vegetable oil. Mix!
C. Activity
Hide some dinosaurs inside the sand bin! The kids will use paintbrushes to act like paleontologists to discover the dinosaurs!
Once they have found all the dinosaurs, they can play with them in the sand or place them in the mud (pudding).
At the end of play-time, have them help clean up! Grab a bin of water so they can help give the dinosaurs a bath! 3 sensory activities in 1! Gotta love that :).
Activity #8: Dinosaur Learning Activity Book
I really enjoy making these activity books. It is JAM PACKED with learning!
In this activity book, your little ones can work on the following skills: alphabet matching, colors, shapes, patterns, beginning sounds, counting, and numbers.
Check out what is in the entire activity book by checking out this video!

How to do this activity
A. Materials you need
- My Dinosaur Activity Book
- a 1″ binder
- sheet protectors
- scissors
- velcro circles
- ziplock bags
- laminator (unless you want to get it laminated)
- laminating sheets.
Click HERE to grab your Dinosaur Learning Book

B. Set-up
This does take some set-up but believe me, it’s well worth it! Laminate only the sheets that need it (these are the pieces). The other main sheets can go in sheet protectors inside the binder. Cut out the pieces once laminated. If it’s an activity that would need velcro circles, you can add those on there and on the binder so they will stick together.
C. Activity
Your little one can complete the activities over and over again! This is a great way to practice new skills as well as work on recognition!
I just bought this laminator for my house! I love having my own laminator because I can laminate all the activity sheets that I want to do repeatedly. It saves so much on ink and paper.
RELATED: ABCDeeLearning’s Teachers Pay Teachers Store
Activity #9: Dinosaur Egg Alphabet Match
Alphabet matching is a great way to review the letters of the alphabet with preschoolers!
It’s a way to check for understanding that kids can differentiate between the letters. This is a FUN and engaging way to get them excited to learn.

How to do this activity
A. Materials you need
- FREE Dinosaur Alphabet match
- plastic eggs
- sand (optional)
- letters
- sensory bin (optional)

Click HERE for your FREE Dinosaur Letter Match
B. Set-up
Print off my FREE dinosaur alphabet match printable. Cut out the letters and place them inside plastic eggs.
C. Activity
You can have all the eggs in a sensory bin, or you can even hide them around your home or classroom for the kids to find!
They will open up the egg, identify the letter and match it up to the egg on the dinosaur alphabet mat!
RELATED: Alphabet Activities for Preschoolers
Activity #10: Letter Collage
This dinosaur activity for preschoolers is a fun way to create a letter of the alphabet!
It helps them connect an object with a letter, which also helps build beginning sound skills!

How to do this activity
A. Materials you need
- tissue paper
- cardstock paper
- glue
- googly eye

B. Set-up
Make a bubble letter d on a piece of white cardstock paper with a marker.
Have your little one start scrunching up pieces of green tissue paper!
C. Activity
Put glue ALL over the letter d. They will be filling up the entire letter with scrunched tissue paper.
Start placing the scrunched-up tissue paper balls onto the letter.
Create spikes out of orange cardstock paper and glue them on the curve of the d.
Lastly, make a head shape using green cardstock paper and add a googly eye to finish your letter craft.
RELATED: EASY Letter D Crafts and Activities
Activity #11: Dinosaur Skeleton Craft
My kids are really intrigued by dinosaur fossils! I love taking them to the Natural History Museum to check out the dinosaur bones.
This craft is a fun way for preschoolers to create their own dinosaur skeletons!

How to do this activity
A. Materials you need
- black and colored cardstock
- chalk
- glue
- FREE dinosaur template
Click HERE for your FREE Dinosaur Template
B. Set-up
Draw a dinosaur on black cardstock paper. You can use my FREE template if you need it.
Create the bony plates out of different colored cardstock paper.
C. Activity
Have the kids draw the dinosaur’s head and bones using chalk, a chalk marker, or a white pastel crayon.
Then, they will use colored cardstock paper to create the bony plates on the back of the stegosaurus!
Glue them on the black cardstock paper.
RELATED: Teaching Resources
Activity #12: Clay Dinosaurs
I needed to add this to my list because it is such a cool dinosaur activity for preschoolers! My 3 and 6-year-old created these dinosaurs a month ago and are still playing with them!
These are clay dinosaurs that your kids can make. Everything comes in the box that you need.

How to do this activity
A. Materials you need
- clay dinosaur kit
- art tray
B. Set-up
Take everything out of the box and place it on an art tray.
C. Activity
Have your child create their own clay dinosaur! There are 3 dinosaur skeletons included. They can mix the colors and create their own special dinosaurs to play with.
RELATED: Best Toys for 4-Year-Olds
Activity #13: Writing Tray
Writing trays are a frustration-free writing activity for kids! They don’t have to stay within the lines, and they can just try their best to learn how to form the letters.
I always try to add something fun like sprinkles, shaving cream, or corn into my writing trays! The kids love the sensory aspect of it.

How to do this activity
A. Materials you need
- tray
- Bone Letters Printable
- sand
- paintbrush
Click HERE to grab your Bone Letter Printable

B. Set-up
Print off the letters you want to work on so your child knows how to create each letter! Then, in a tray, dump in the sand!
C. Activity
Your child can use their fingers, a paintbrush, or Q-tip to create the letters in the sand! They should identify the letter that you place in the tray then create it! Repeat for all the letters.
RELATED: Handwriting Activities for Preschoolers
Activity #14: Bone Letters
Here’s another way to use those bone printables that you just saw up above! This activity includes counting and letter building.
These bone letters are PERFECT for a dinosaur-themed lesson in your classroom or at home.

How to do this activity
A. Materials you need
- letter bone cards
- toy bones or Q-tips
Click HERE to grab your Bone Letter Cards

B. Set-up
Print off the letters you want to work on with your little ones and get your other materials ready.
C. Activity
Place the card in front of your child and have them create a specific letter using the bones or the q-tips. If you have an older child, you don’t have to use the cards; they can just try to build the letter on their own!
RELATED: Handwriting Activities for Preschoolers
Activity #15: Feed and Count Dinosaur Activity
Feeding activities have become a BIG hit around here! They work great for fine motor skills, color recognition, and counting skills.
This dinosaur activity for preschoolers is a great way to hit multiple learning skills while having some fun!

How to do this activity
1. Materials you need
- Count and Feed Dinosaur Printable
- poms
- sensory bin
- plastic cups
- tape
- laminator(optional)
- scissors
- knife
- kid-friendly tweezers
Click HERE for your Count and Feed Printable

2. Set-up
In a sensory bin, dump a whole bunch of different colored poms! Print off the characters and the counting cards. Cut out the characters, punch a hole in their mouth using a knife, and then cut the inside part of the mouth open. Tape the characters to a cup.
3. Activity
Have your little ones use the counting cards to see what color and how many of each color they should place inside the character’s mouth. They can use kid-friendly tweezers to add some fine motor skills, or you can just have them use their hands. They should tell you the number and count out loud how many they are placing inside!

RELATED: ABCDeeLearning’s TpT Store
Activity #16: Dinosaur Dirt Cups
Looking for a yummy dinosaur treat for your toddler? These dirt cups couldn’t be easier.
I always appreciate an easy recipe. I’m not the best cook, so I look for fun and simple ideas like this for the kids!

How to do this activity
A. Materials you need
- chocolate pudding
- Oreos
- plastic cups
- dinosaur gummies
- meat mallet
B. Set-up
Make the chocolate pudding by following the directions on the box.
Crush Oreo cookies by placing them in a plastic bag. Close the bag and crush them using a meat mallet.
C. Activity
Add a little pudding at the bottom in plastic cups, then add a layer of Oreo cookie crumbs. Do this several times, so there are a few layers in the cup.
There should be chocolate pudding as the top layer; add some dinosaur gummies on the top!
Serve and enjoy 🙂
RELATED: 10 Active Party Ideas for Kids
Activity #17: Dinosaur I SPY
I SPY activities have become a staple for us! The kids enjoy searching for the objects and seeing if they can find all of them before the other one can.
This is a wonderful and fun way to get some counting practice in as well!

How to do this activity
A. Materials you need
- FREE I SPY printable
- marker
Click HERE for your FREE Dinosaur I SPY
B. Set-up
Print off the I SPY sheet and grab a marker!
C. Activity
Go through each of the objects on the sheet and have the kids find them on the sheet. Once they find one, cross it off with a marker, so they don’t go back to the same one. Have them write the amount there is on the line!
RELATED: Teaching Resources
Activity #18: Dinosaur Tag
We <3 dinosaur tag! This dinosaur activity for preschoolers will be a hit for sure!
I love you can play it was just a few people or a whole group.

How to do this activity
A. Materials you need
B. Set-up
At one end of the playing area, place a hula hoop and a bunch of bean bags. On the other end of the playing area, place a single hoop.
Place cones on the sides of the playing area so kids know where the boundary lines are.
C. Activity
* Depending on how many kids are playing, choose 1-2 players to be the taggers (dinosaurs). Give them a cut pool noodle. They will go in the middle of the set of hula hoops.
* Split up the teams evenly and place them in a line behind the single hula hoop that doesn’t have the beanbags in it.
*On the go signal, the first person in each line from each team will attempt to get to the other side of the playing area where the beanbags are. If they can get there, they can grab a beanbag (dinosaur egg), and they are in the “safety zone.” Once they leave the hoop, they can get tagged.
* If they get tagged on the way back with a beanbag, they have to put it back in the hoop, and they tag the next person in line to try.
*If they get tagged on the way down and don’t have a beanbag, they just go back in line and tag the next player.
The game’s goal is to be the team with the most “dinosaur eggs” in their hoop!
RELATED: Tag Games for Kids
Activity #19: Dinosaur Lava Experiment
This lava experiment is my favorite of all the activities we have done with this dinosaur theme!
The kids ended up playing with this setup for 45 minutes! The fact that you can keep the experiment going for that long is AMAZING!

How to do this activity
A. Materials you need
- baking soda
- droppers
- vinegar
- dinosaur toys
- tray
- food coloring
- cups
- color chemistry set

B. Set- up
Dump an entire box of baking soda in a tray!
Make a volcano by using the clay that’s provided in the set. Place it around the beaker and paint it with the food dye provided or use your own at home! Inside the beaker, add a little baking soda!
Fill up plastic cups with vinegar and add a few drops of food coloring (red, orange, and yellow for the lava).
C. Activity
Add dinosaurs into the tray so they can play along with the figures during the experiment.
The kids will use droppers to move the vinegar-colored mix into the baking soda to see it fizz! This will go on for a long time since the whole tray is filled up!
Have them drop vinegar inside the volcano to see it explode!

RELATED: Best STEM Toys for Kids
Activity #20: FREE Dinosaur Learning Pack
I love being able to provide you with some FREE learning resources! This packet focuses on parts of a dinosaur, the lifecycle, and important facts about dinosaurs.
Also, you will be able to work on some cutting and gluing skills with this packet.

How to do this activity
A. Materials you need
- FREE Dinosaur Learning Pack
Click HERE to grab your FREE Dinosaur Learning Pack
B. Set-up
Print off the learning pack! You can try the craft you see above; that was something we did along with completing the packet here at home with my kids.
C. Activity
Complete the activities together with your little one!
Review the lifecycle of the dinosaur worksheet with them before having them complete it.
Talk about the different dinosaurs on each worksheet and have the kids practice cutting and gluing skills.
RELATED: Teaching Resources
Final Thoughts and Conclusion
Dinosaur activities for preschoolers are ALWAYS a hit!
I hope you could find some crafts and activities that you can do with your kids or students! Do you have any dinosaur-themed activities that you have done that worked well? I’d love to hear about them!
Happy Learning!
Deena


