Handprint Paper Bouquet
Make this handprint paper bouquet for a special gift for someone! Perfect for Valentine’s Day, Mother’s Day or any special occassion.
This is an easy craft that is a perfect keepsake for someone special in your kiddos life!

Check out all the details below on how to make this handprint paper bouquet.
Materials you need
Here are all the supplies you need to create handprint paper bouquets.
- cardstock paper(this set of cardstock paper is bright and has a lot of fun colors)
- scissors
- glue stick
- yarn(we love this set of small colored yarn! We use it for so many fun crafts)
Step by Step Directions
Below you will see all the directions on how to make these handprint paper bouquets.
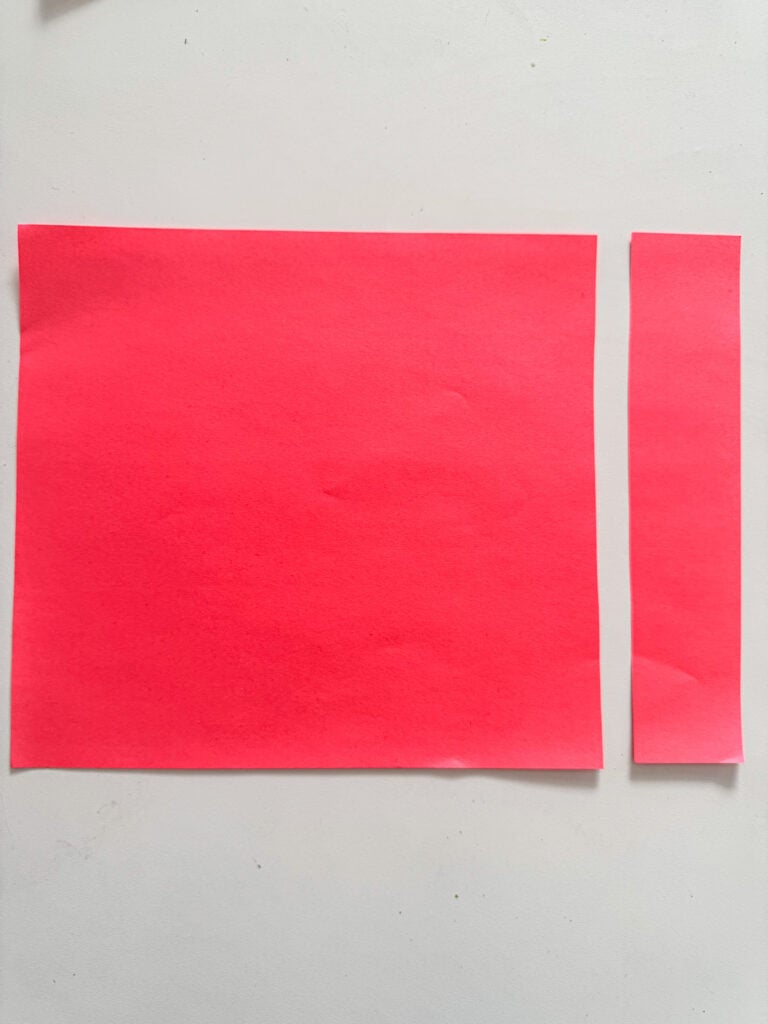
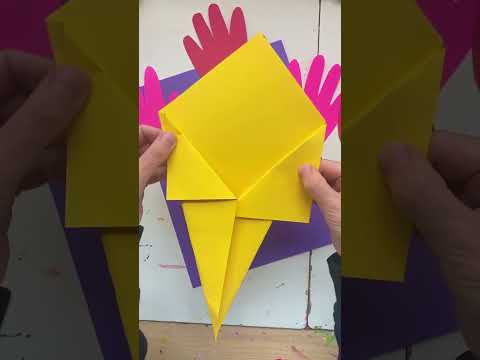
#1: Choose your color base you want for the bouquet. Turn your paper horizonally and use scissors to cut about 2″ off one of the ends of the paper.
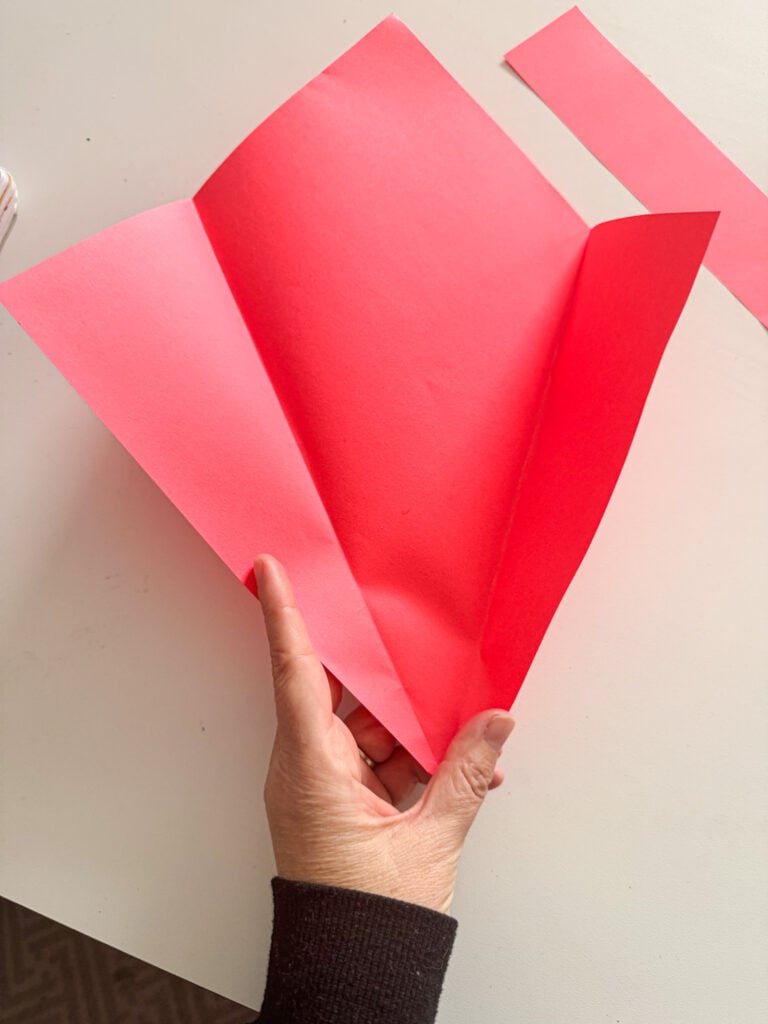
#2: When you turn your paper, it should look like a diamond shape. Then, take opposite ends and fold them in to meet at the center (it doesn’t have to be exactly perfect).
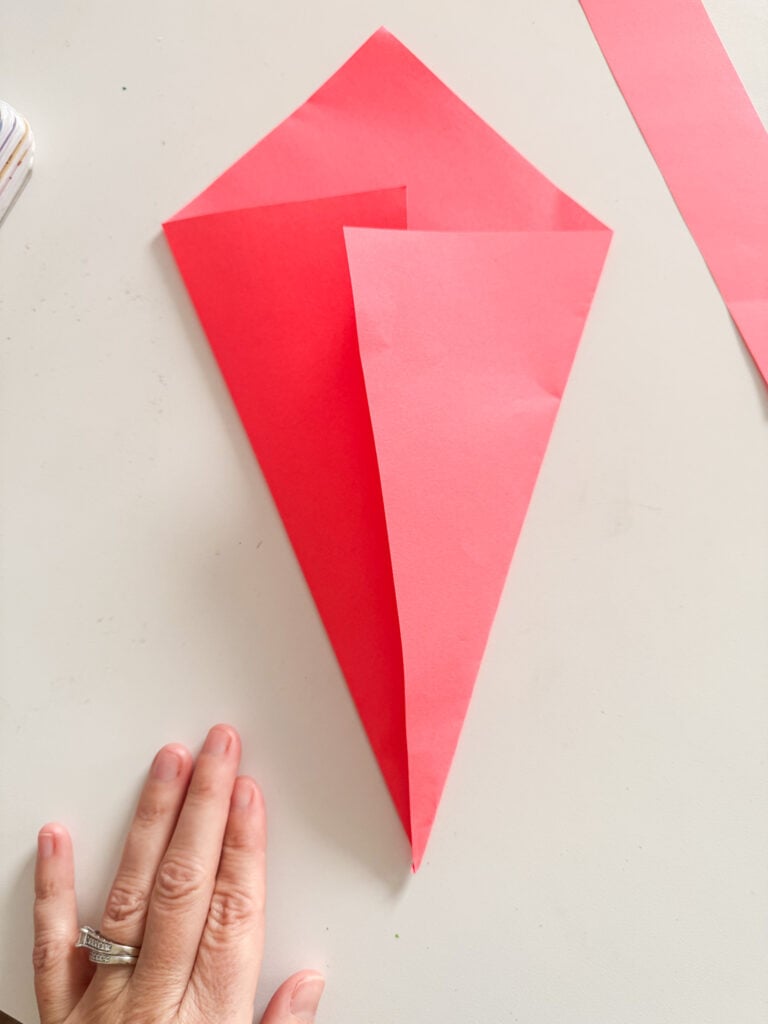
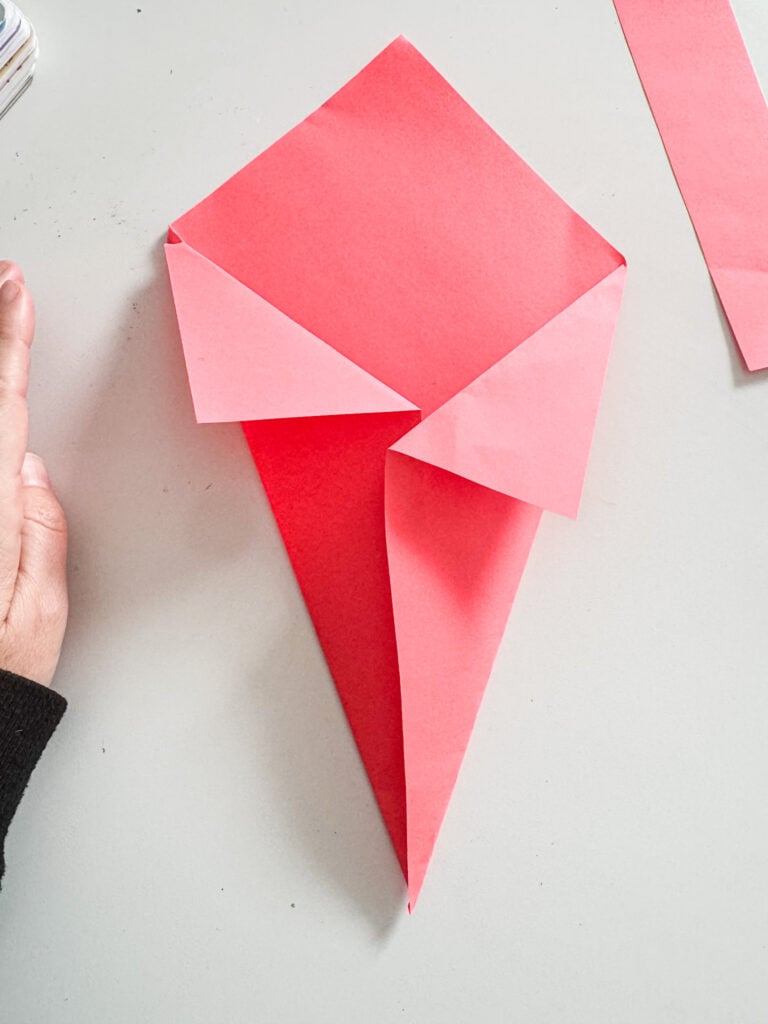
#3: Then you’ll pull down the inside corners and complete the paper bouquet.
#4: Trace your child’s hand on different cardstock paper colors and cut them out.
#5: Attach thin pieces of green cardstock paper by using a glue stick to create stems. Then, glue them into the paper bouquet!
#6: Lastly, you can add on some colored yarn to make a bow at the end!
Final Thoughts and Conclusion
These handprint paper bouquets make for the cutest DIY gift for someone!
Check out all my other Valentine’s Day craft ideas HERE.
Deena


