20 CUTE Insect Crafts for Kids (2026)
Looking for insect crafts?
I have 20 fun insect crafts and activities that are perfect to do in the classroom or at home with your kids!
Let’s get started with these cute insect crafts.
#1: Ladybug Handprint
My kids love ladybugs! Whenever we see them outside, they have to go check them out.
This insect craft is adorable and easy to make with the kids.

How to do this activity
A. Materials you need
- colored paper
- glue stick
- glitter glue
- googly eyes
- glue
- marker
B. Set-up
Trace your child’s hands-on red paper. We fold the paper in half and then cut the handprint out so you can get two prints easily.
C. Activity
Make dots on the handprints with a black marker. You could also use paint and make fingerprint dots!
Trace a small bowl twice and make two circles, one for the head and one for the body. We used the same size circles.
Then, use a glue stick to glue the handprints on the body so they can fan outward like you see above.
Glue the body to the head and make a face using googly eyes and glitter glue for the cheeks!
RELATED: Bee Crafts
#2: Sponge Caterpillars
How adorable is this insect craft for kids? I LOVE using sponges to create.
This is a simple caterpillar craft that’s great for springtime.

How to do this activity
A. Materials you need
- sponges
- Sharpie
- paint
- googly eyes
- paper
- scissors
- glue stick
B. Set-up
Circle circles on sponges using a Sharpie, then cut them out.
C. Activity
Dip the sponges into red and green paint. We used two different colors of green paint.
Make your prints to make the caterpillars!
Then, create little legs and antennae out of brown paper. Paste them on with a glue stick.
Once the paint dries, add googly eyes and a smile with a marker.
Lastly, we made grass out of green paper by cutting a strip of paper off and making small cuts to look like grass.
RELATED: Butterfly Crafts
#3: Bee Paper Bag
The kids love making paper bag crafts because they can use them as puppets.
This bee craft is easy to make and perfect for springtime.

How to do this activity
A. Materials you need
- paper bag
- acrylic paint
- cardstock paper
- poms
- clothespins
- googly eyes
- glue
- scissors

B. Set-up
Paint the paper bag yellow. We used acrylic paint, but you can also use different kinds of paint.
C. Activity
While you are waiting for the bag to dry, create the wings for the bee, antenna, and stinger. We like to use cardstock paper for crafts because it holds up better than construction paper.
Use a glue stick to paste these onto the paper bag.
Attach a craft pom to a clothespin for kids to make the black lines of the bee on the bee. They will dip the pom in paint and make lines going across the bag.
Paste googly eyes on and make a smile for the bee!
RELATED: Spring Crafts
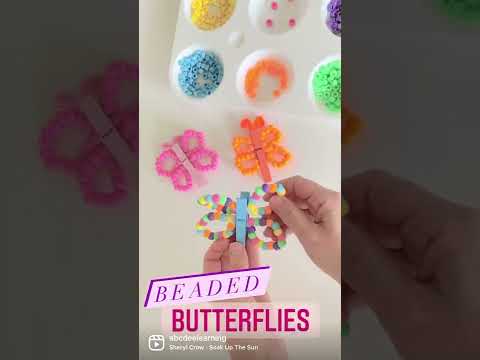
#4: Beaded Butterfly Craft
These beaded butterflies are so much fun to make. It’s the perfect spring craft for kids!
I love how you can make this a color-matching activity or work on patterns.

How to do this activity
A. Materials you need
- beads
- clothespins
- pipe cleaners

B. Set-up
Using one pipe cleaner, add the beads you want on it, twist the pipe cleaner closed at the top. Then, you are going to bend the pipe cleaner in half to make the two halves of the butterflies wings.
You are going to do this step twice for both sides of the butterfly.
C. Activity
Add a clothespin in the middle of the two pipe cleaners to make the entire butterfly! Cut two smaller pieces of pipe cleaner to make the antenna and stick them in the top of the clothespin.
Check out the video below to see it in action (it’ll make more sense by watching the video).
RELATED: Fine Motor Activities
#5: Looped Paper Caterpillars
This caterpillar craft is colorful and fun! I love all the details of this craft.
This insect craft is great for kids who are learning about the lifecycle of a butterfly.

How to do this activity
A. Materials you need
- colored paper
- googly eyes
- glue stick
- hot glue (optional)
- one hole punch
- marker
- scissors
B. Set-up
Cut strips of colored paper. We did these strips on the wider side so the caterpillar would be big enough.
Also, create a leaf shape out of green paper and cut it out.

C. Activity
Use a glue stick to attach the loops together to make your caterpillar. You can also use hot glue if you want to make sure it stays secure. We used 6 loops.
Then, attach googly eyes and two paper antennae on the first loop for the face.
Have the kids use a one-hole punch to make a bunch of holes in the top of the leaf to make it look like the caterpillar was eating the leaf!
Glue the caterpillar to the leaf using a glue stick (or hot glue), and you have the cutest caterpillar craft.
RELATED: Letter C Crafts for Kids
#6: Splat Art Butterfly Craft
Splat art is a fun process for kids to create! They love being able to smoosh the paper together and reveal the other side.
This insect craft turns out so pretty!

How to do this activity
A. Materials you need
- black cardstock paper
- Q-tips
- acrylic paint
- scissors
- glue stick
B. Set-up
Create a butterfly shape on black cardstock paper and cut it out.

C. Activity
Use a Q-tip and dip it into paint and use it as a paintbrush to create your butterfly designs. You’ll make the design on one side of the butterflies wing.
Then, fold the butterfly shape over and press down around the entire shape.
Then, peel it open to reveal the symmetry on the other side! This is such a fun process.
Lastly, create the middle of the butterfly by drawing an oval shape. Make paper antenna and glue it of the back of the butterfly.
#7: Snail Paper Plates
These snail plates are just the cutest and super easy to make.
This insect craft is an adorable keepsake with fingerprints on the shells.

How to do this activity
A. Materials you need
- small paper plates
- acrylic paint
- glue
- googly eyes
- paper
- art mat

B. Set-up
Make a snail body shape out of colored paper and cut it out.
We also made grass out of a strip of green paper by cutting small slits throughout the entire strip.
C. Activity
Paste the grass on the bottom of a white piece of paper. Then, paste the snail shape you created just above the paper.
Add googly eyes and a smile to finish the face of the snail.
Then, on a small paper plate, have the kids create fingerprints all over the shell! Paste the shell on top of the snail’s body!
How adorable is this insect craft?
RELATED: Paper Plate Crafts
#8: Spiderweb Popsicle Sticks
This is one of my favorite Halloween crafts that we have done.
I love the different colors of spider webs, and the kids enjoyed using the thread to create them.

How to do this activity
A. Materials you need
- small popsicle sticks
- acrylic paint
- colored yarn
- toy spiders
- hot glue

B. Set-up
Have the kids paint the popsicle sticks using acrylic paint. You can make them a whole bunch of different colors or stick with one. You need 4 popsicle sticks for each web that you want to make.
Wait for them to dry; this will take about 30 minutes to dry completely.
Once they are dry, the adult will hot glue them together. First, make a plus sign with the sticks, then glue the other two in the shape of an X behind the plus sign.
C. Activity
The kids will take the colored thread and wrap them around the spider web. Have them start at the bottom of the sticks by wrapping them around each stick, then make their way up towards the top.
Once they have wrapped the yarn around the sticks, grab a small piece of tape and tape the end to the back of one of the sticks. This will hold the yarn in place!
If you want to add toy spiders onto the popsicle sticks, the adult can hot glue them on.
RELATED: Spider Crafts
#9: Handprint Butterfly Craft
This is a simple paper insect craft for kids to make.
I love the colored handprints on this butterfly craft!

How to do this activity
A. Materials you need
- colored paper
- scissors
- glue stick
- googly eyes
B. Set-up
Fold a piece of paper in half and trace your child’s hand on it. Cut out the handprints and repeat this with another color.
C. Activity
Make a skinny oval for the body of the butterfly. Then, paste two handprints together to make one side of the wing. Repeat this for the other side.
Paste the body of the butterfly in the middle of the wings.
Have the kids make spots for the butterfly wings and paste them on. Lastly, make a face and add an antenna to the butterfly!
#10: Sponge Ladybug Craft
Here’s another fun sponge insect craft for kids!
These ladybugs are easy and fun to make. We used Q-tips to make the spots!

How to do this activity
A. Materials you need
- sponge
- marker
- scissors
- paper
- googly eyes
- glue stick
- Q-tips
- paint
B. Set-up
Draw a circle shape onto a sponge and cut it out. You can start creating the head shape for each ladybug.
Make a small semi-circle on black paper and cut them out.
C. Activity
Dip the sponge into red paint and make several prints on paper.
Then, have the kids dip a Q-tip into black paper and make dots on each of the ladybugs! This is a great way to work on some fine motor skills.
They will paste the heads that you created at the top of each ladybug and glue on googly eyes.
Lastly, draw on 6 legs using a black marker. This is a great way to talk about how many legs insects have!
#11: Caterpillar Name Craft
What a great insect craft for toddlers and preschoolers!
Kids love to see their names in crafts, and it’s also a great way for them to learn how to spell their name.

How to do this activity
A. Materials you need
- colored paper
- pencil
- scissors
- marker
- googly eyes
- glue stick
- hole punch
B. Set-up
Grab a small bowl or circle top to a container and trace it! Make the number of circles that you need to create your child’s name.
C. Activity
Have the kids write the letters of their name on each of the circles. You can also do this step if your child isn’t writing yet.
Then, have them glue down the pieces in the correct order to make their name and also to make the caterpillars.
Make antennae out of paper and glue those down on the face as well as googly eyes.
Lastly, we made some leaves around the caterpillar and had the kids use a hole punch to make it look like the caterpillar was eating the leaves. This step is optional, but it was a fun addition to the craft!
#12: Spoon Butterfly Craft
We had some leftover plastic spoons from a party we had, and I wanted to use them for a fun craft!
This insect craft is adorable and fun to make!

How to do this activity
A. Materials you need
- plastic spoons
- acrylic paint
- cardstock paper
- scissors
- Q-tips
- circle paint brushes
- googly eyes
- hot glue/glue
- pipe cleaners
B. Set-up
Paint your plastic spoons using acrylic paint. While you are waiting for them to dry create the wings of the butterfly!
C. Activity
Create butterfly wings out of paper and cut them out.
Use a Q-tip to paint the wings and a circle paintbrush. Create the same designs on both sides of the wings to talk about symmetry with the kids!
Hot glue the spoon to the center of the wings you created. Then, add on googly eyes, cut small pipe cleaners for the antenna, and draw a smile.
#13: Letter A Ant Collage
Letter collages are a great way for toddlers and preschoolers to learn the alphabet.
This insect craft is too cute with fingerprint ants!

How to do this activity
A. Materials you need
- colored paper
- white paper
- glue stick
- black paint
- black marker
B. Set-up
Create a capital and lowercase bubble letter A. Then, cut it out and paste it onto the white paper.
C. Activity
Have the kids create three black fingerprint dots in a row to create a bunch of ants around the letter.
You can even add them on top of the letter too!
Then, use a black marker to create 6 legs for the ants and some antennae on top.
Check out my FREE Letter collage book to put this all together. Click the link below to grab yours!
RELATED: Letter Crafts for Kids
#14: Bee Handprint
I am obsessed with handprint crafts. They make the cutest keepsake crafts.
This bee craft is great to make for a spring card to give to someone special.

How to do this activity
A. Materials you need
- cardstock paper
- black marker
- scissors
- glue stick
- googly eyes
B. Set-up
Trace your child’s hand on yellow paper and cut it out.
C. Activity
Have your kids draw black stripes on their handprints.
Create the wings and antenna out of black paper. Cut and paste them into place using a glue stick.
Then, add on googly eyes and a smile. Write a sweet message like “sweet as can bee”.
#15: Watercolor Butterfly Plates
What a beautiful insect craft for kids and even adults to make! You’ll love using watercolors to create these butterflies.
I love the end result, the colors look so pretty together.

How to do this activity
A. Materials you need
- paper plates
- watercolors
- scissors
- craft poms
- popsicle stick
- pipe cleaners
- hot glue
B. Set-up
Cut a paper plate in half and then make two curves with a pencil on each side on the edges of the plates.
Cut out your curves, these will be the wings of the butterfly.
C. Activity
Use watercolors to paint the paper plates. We used a few colors on each wing.
Make the same design on each side of the paper plates! Let them dry.
Hot glue a popsicle stick in the center of the two plates. Then, use hot glue to attach a few craft poms to the center of the butterfly.
Leave a little of the popsicle stick open at the end so the kids can hold it and make their butterflies fly!
Lastly, cut a pipe cleaner into smaller pieces and hot glue them to the back of the popsicle stick for the antenna!
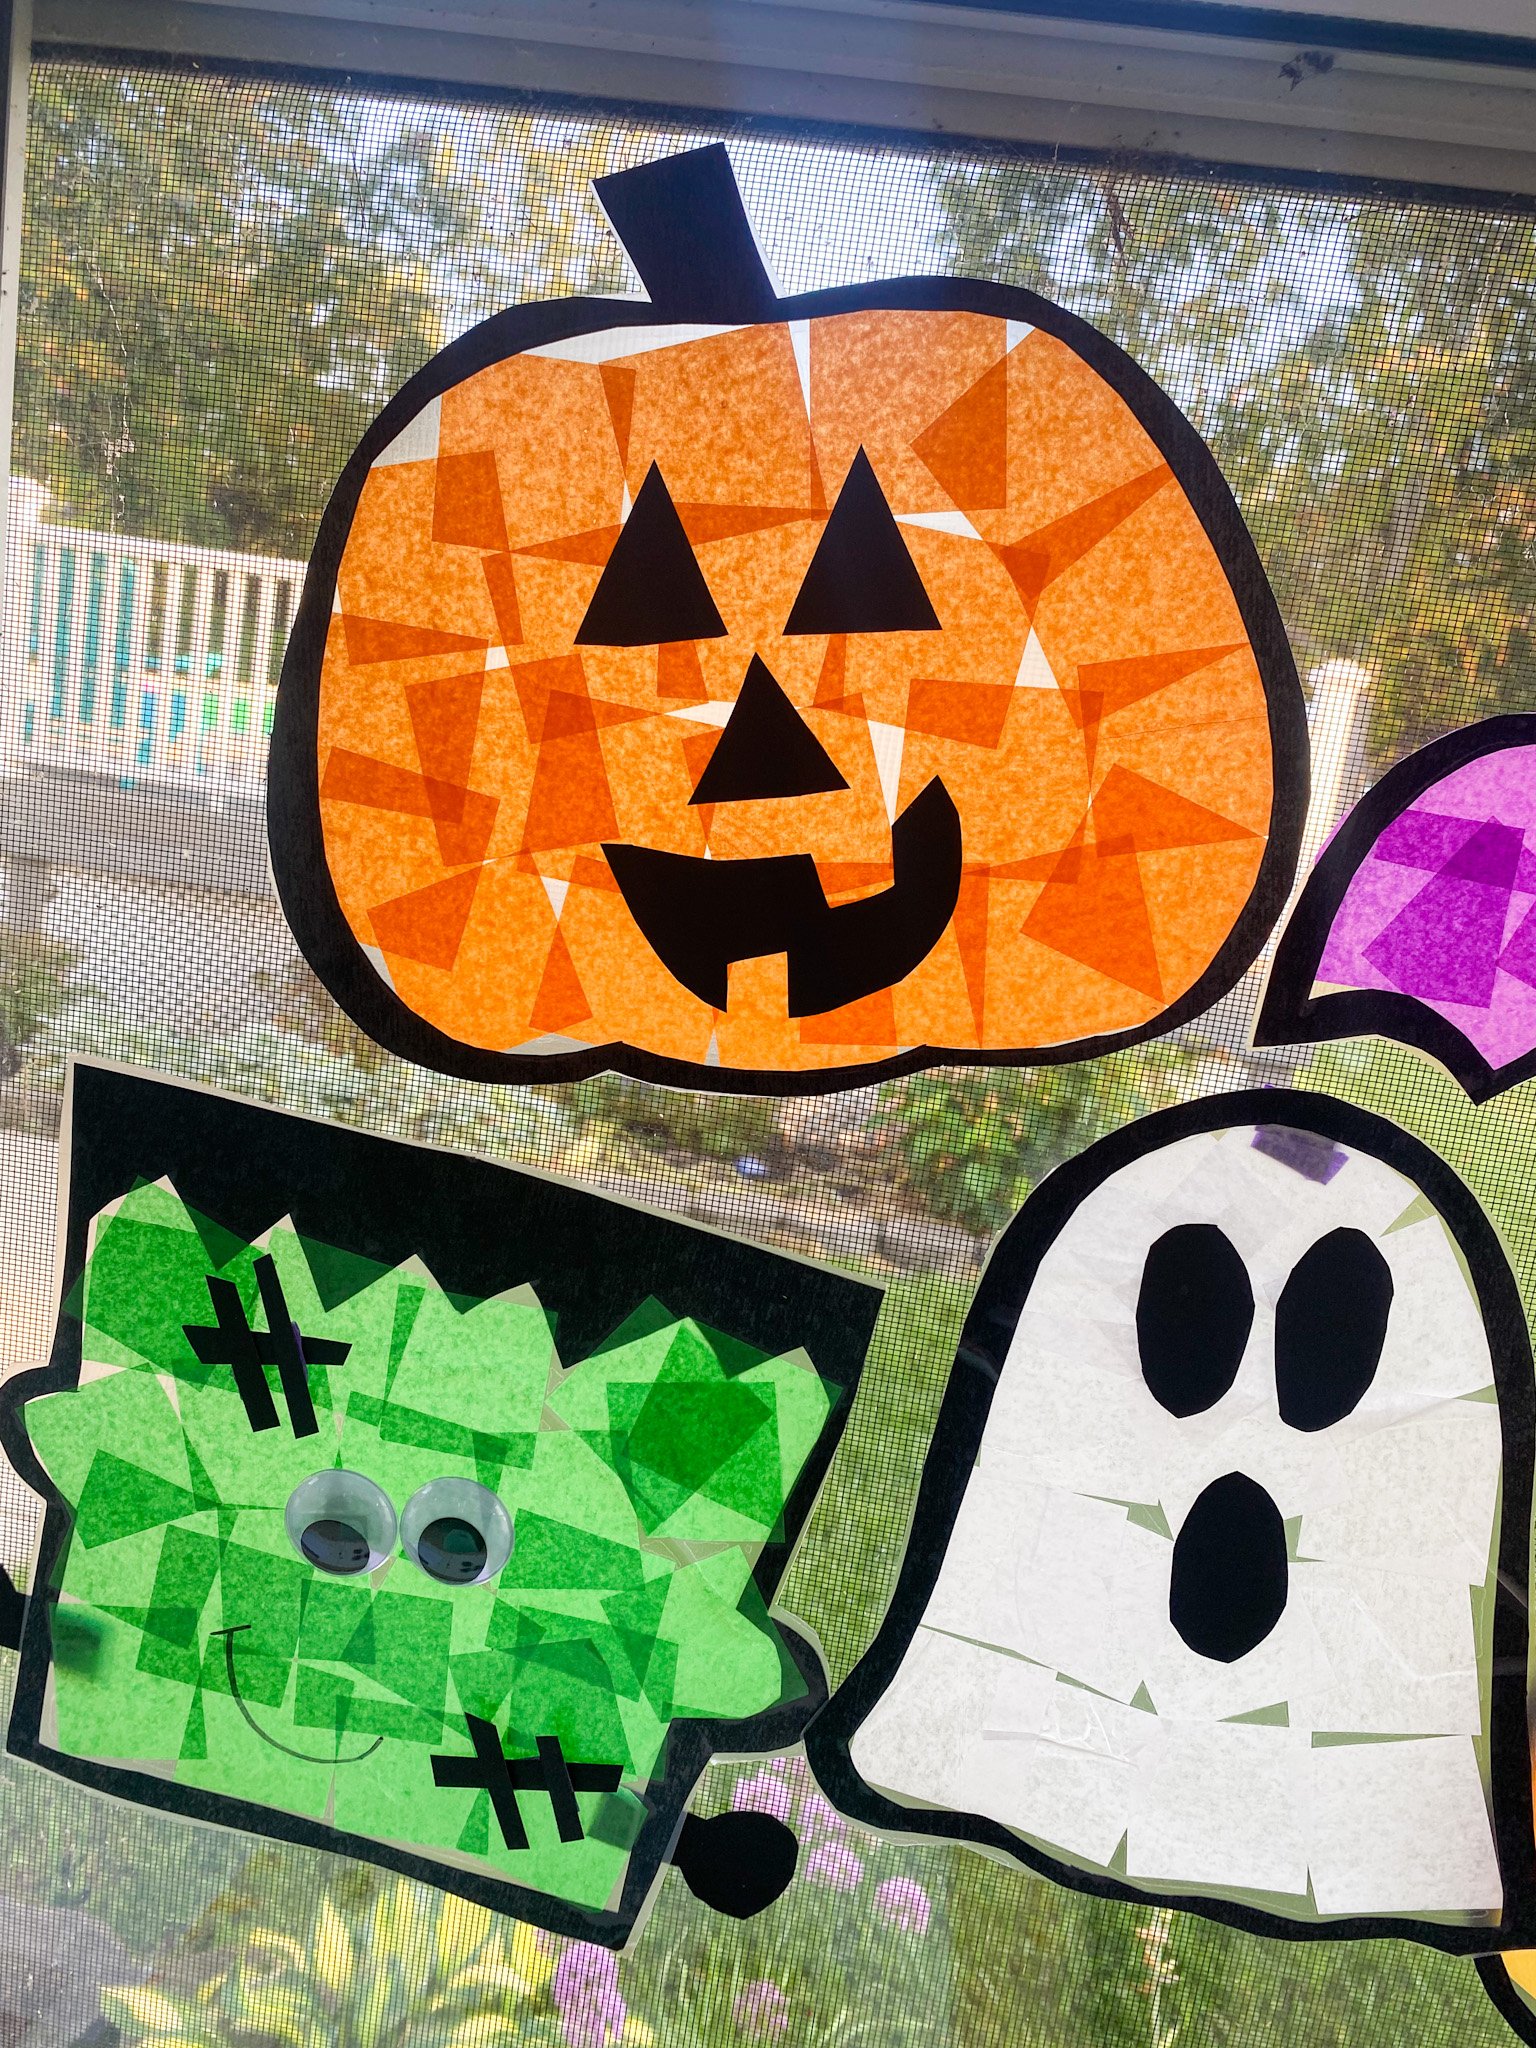
#16: Salt-Painted Spiderweb
Salt painting is my favorite activity to do with my kids. They love watching the watercolors flow through the salt.
This spider insect craft is a must-try activity.

How to do this activity
A. Materials you need
- black cardstock paper
- salt
- glue
- watercolors
- pencil
- paintbrush
- art tray

B. Set-up
On cardstock paper, draw the spiderweb using a pencil. Then, outline your drawings in school glue.
C. Activity
Have the kids sprinkle salt on top of the glue. There should be a TON of salt on the paper. They should remove the excess into the trash.
You can choose to do this activity right away or wait till the salt dries. I like doing it both ways, but if you decide to wait, I think the colors turn out better.
They will use watercolors to paint the spiderweb! They can use Halloween colors or whatever colors they want.
Let it dry and see how beautiful it turns out! This is such a great spider craft for kids.
RELATED: Halloween Crafts
#17: Ladybug Paper Plate
I love how simple this insect craft is for kids to make. They will love creating these cute ladybugs!
The giant googly eyes make this craft so fun!

How to do this activity
A. Materials you need
- small paper plates
- acrylic paint
- circle brush
- black paper
- scissors
- glue
- googly eyes
B. Set-up
Paint the small paper plate red!
C. Activity
Create the ladybug’s head by drawing a semi-circle out of black paper. Cut it out and use a glue stick to paste it under the plate.
Then, cut six strips of black paper for the legs and paste three on each side.
When the plate is dry, the kids can use a circle brush to make black dots all around the plate.
Add googly eyes and paper antenna to the head of the ladybug, and you have the cutest insect craft!
#18: Worm Craft
These will be the cutest worms you ever see. This insect craft is cut and fun for the kids to make.
My kids are fascinated by worms. It’s a great spring craft because you see worms everywhere.

How to do this activity
A. Materials you need
- paper
- googly eyes
- glue stick
- scissors
B. Set-up
Create an apple shape on red and green paper and cut it out.
C. Activity
Make the stem and leaf for the apple and use a glue stick to paste them onto the back of the apples.
Create a small slit at the bottom of the apple on the side by drawing a line with a pencil. Poke a small hole through the line and use scissors to cut the slit.
Draw your worm shape, cut it out, and make the worm. Add googly eyes, lines for the worm, and small smile!
Stick the bottom of the worm through the slit and pull it through and use a glue stick to glue down the top part of the worm to the apple.
RELATED: Apple Crafts
#19: Bee Toilet Paper Roll
Toilet paper roll crafts are great because you always have them on hand.
This bee craft is fun to make, and it’s great for all ages!

How to do this activity
A. Materials you need
- toilet paper rolls
- acrylic paint
- cardstock paper
- scissors
- hot glue
- googly eyes
- pipe cleaners

B. Set-up
Paint toilet paper rolls yellow. We like to use acrylic paint for projects like this because the paint is bolder!
C. Activity
While you are waiting for the rolls to dry, create your black stripes for the bee, wings, and face for the bee.
Since I wanted the face to be the same color as the roll, I made a circle out of white cardstock paper and painted it the same color as the roll.
Paste your black stripes onto the roll, we made 2-3 stripes.
Make the face for your bee by adding on googly eyes and a smile. Hot glue the face to the roll, so it stays on.
Then, hot glue the wings to each side of the roll.
Lastly, cut a pipe cleaner into a few small pieces and curl one end to look like an antenna. Hot glue these onto the back of the face of the bee.
RELATED: Letter B Crafts
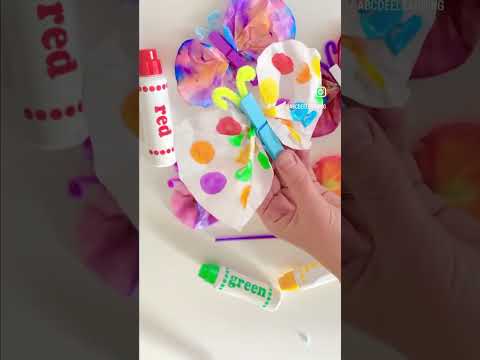
#20: Coffee Filter Butterfly
This is a classic insect craft for kids! It’s such a fun activity for kids.
I love the fact that you can even scribble on the filters, and it will still turn out beautiful.

How to do this activity
A. Materials you need
- coffee filters
- markers
- squirt bottles/ droppers
- water
- art trays
- clothespins
- Sharpie
- pipe cleaners
B. Set-up
Flatten out a coffee filter on an art tray. Create a design using a marker on the filter. You can even scribble on it! Once done, spray it with water and let dry.
On a clothespin, draw a face with Sharpie or even put googly eyes on them!
C. Activity
Fold front and back like an accordion. Then, place the clothespin in the middle and stretch out the sides to look like a butterfly!
Each one is unique!
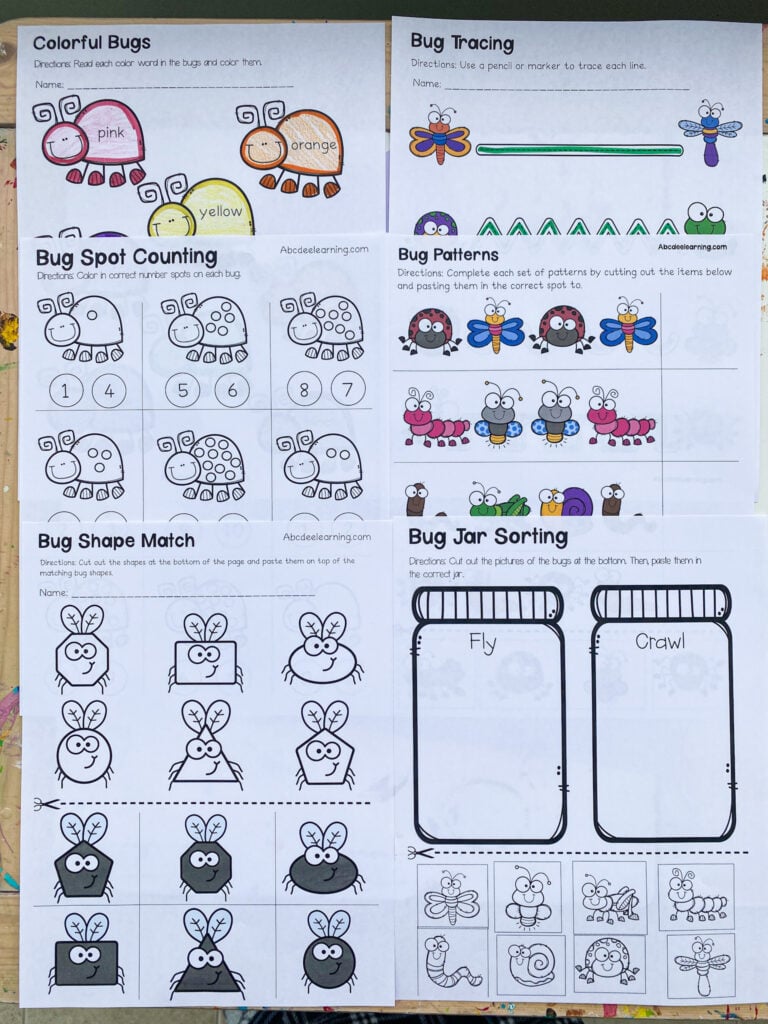
#21: Insect Learning Pack
I have a free insect learning pack for you! There are activities to work on so many skills.
These insect learning activities are perfect for your bug unit at school or for home learning.
How to do this activity
A. Materials you need
- markers
- crayons
- glue stick
- scissors
Click HERE to get your free insect themed learning pack
B. Set-up
Print off the sheets you want to complete!
C. Activity
The kids will complete activities to work on shapes, patterns, tracing, insect sorting, numbers, and counting.
Final Thoughts and Conclusion
Insect crafts are just way too much fun! It’s a great way to teach the kids about insects. Honestly, it helped my kids not be so afraid of them too.
I hope you have found some insect crafts that you can do with your kids.
Happy Crafting!
Deena