35 CUTE Pumpkin Crafts for Kids (2026)
Looking for some pumpkin crafts?
I have 35 FUN pumpkin crafts that your kids will LOVE! These are fun, easy, and perfect to do in the classroom or at home.
Let’s get started with some pumpkin crafts!
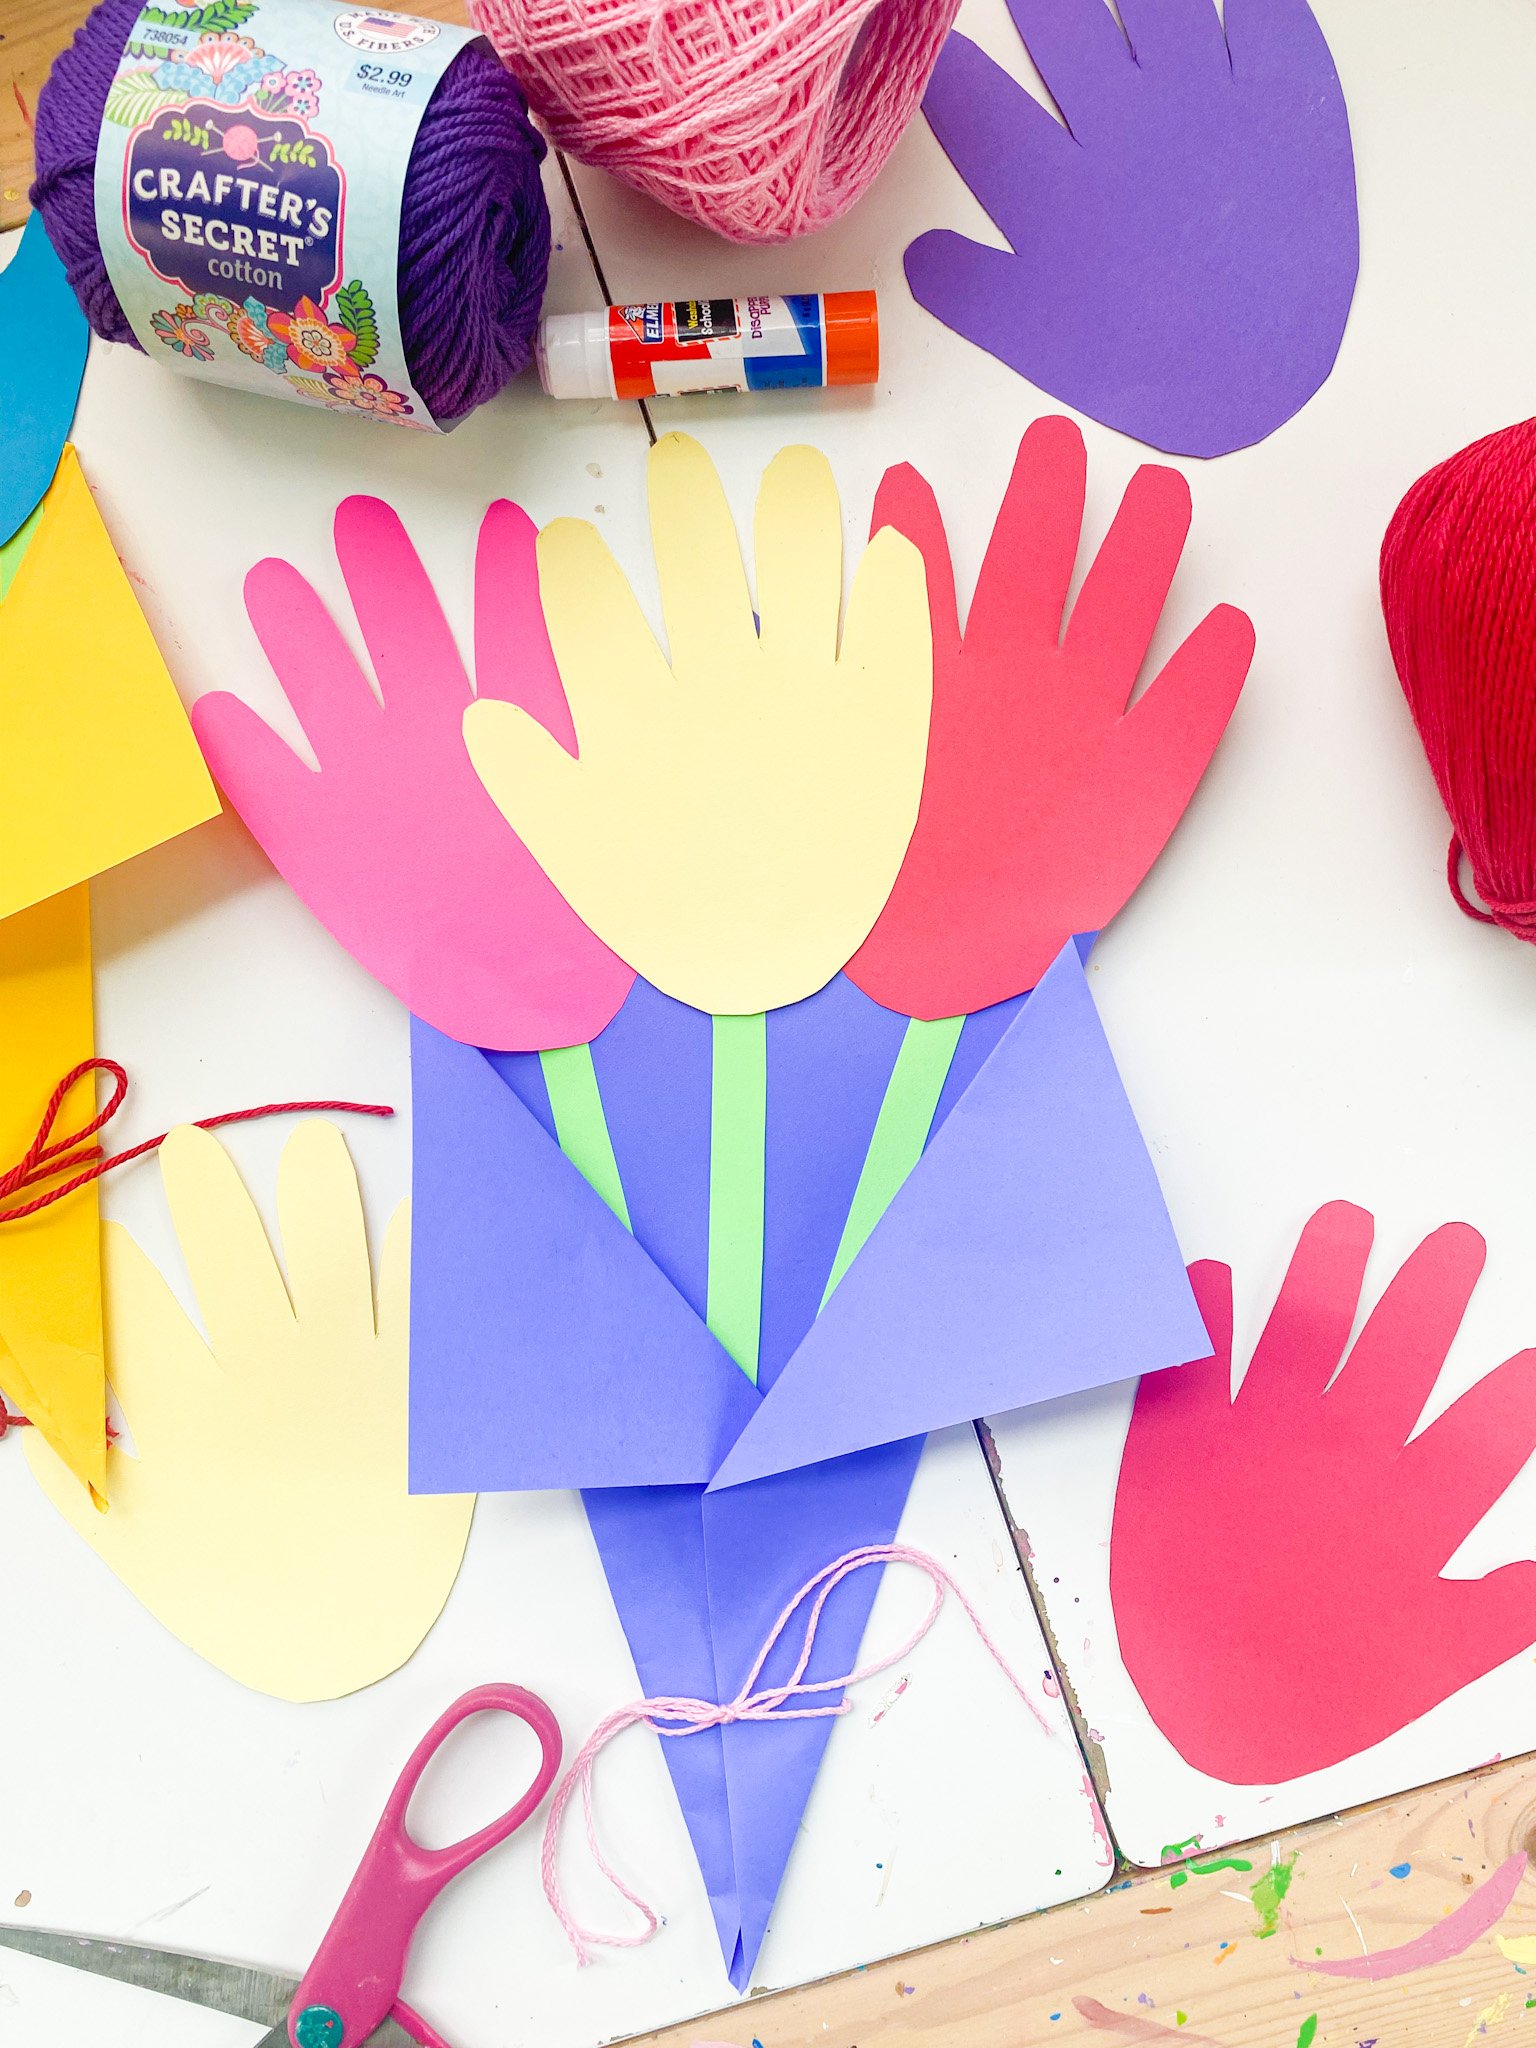
#1: Handprint Pumpkins
Handprint crafts are just the cutest thing. We have to do them for each article I make because I love them that much.
This pumpkin craft is the perfect keepsake to try this fall season.

How to do this activity
A. Materials you need
- colored paper
- paint
- paintbrush
- glue stick
- black acrylic paint marker
B. Set-up
Paint your little one’s hand orange and make prints on white card stock paper. Press the entire hand down so the entire handprint will show up.
You’ll have to wait for it to dry to continue. It takes about 20 minutes to dry completely.
C. Activity
Cut out the handprint. When you are cutting it out, make sure to leave some space at the top for the stem and leaf.
Paint on the stem and make a fingerprint for the leaf!
Have the kids create a face for the pumpkins using a black acrylic paint marker. Then, they will use a glue stick to glue it down to the colored paper!
Write a message on the paper! This is a cute gift to give someone or to keep at home for yourself.
RELATED: Halloween Handprint Crafts
#2: Puffy Paint Pumpkins
Making your own puffy paint is EASY, and it’s fun! This is a great pumpkin craft for preschoolers!
You just need to mix 3 ingredients together that you most likely have right at home.

How to do this activity
A. Materials you need
- cardstock paper
- white school glue
- foam shaving cream
- food coloring
- bowls
- scissors
B. Set-up
Create the colors of puffy paint that you want by mixing equal parts white school glue and foam shaving cream. Then, add the colors of food coloring you want. We used orange, green, and brown.
Also, create pumpkin shapes on white or black card stock paper. You have to use card stock paper because it’s thicker and it’ll hold up better than regular paper.

C. Activity
Use a spoon to mix the puffy paint together. Then, scoop it out with the spoon, put the paint on the pumpkin shape, and spread it using a paintbrush.
Once you are done painting the pumpkin, create the stem and leaf with the puffy paint.
Lastly, make eyes, a nose, and a mouth for your pumpkin and place them on top!
Wait for it to dry (it takes about a night to fully dry), and see how it feels! This is such a fun sensory pumpkin craft.
RELATED: Ghost Crafts
#3: Splat Pumpkins
Splat crafts couldn’t be any easier and more fun for the kids. This pumpkin craft is PERFECT for toddlers and preschoolers.
My favorite one is the black and orange one since it’s a little different!

How to do this activity
A. Materials you need
- paint
- cardstock paper
- scissors
- glue stick

B. Set-up
On a white piece of cardstock paper, add orange paint to one side of the paper in a circular shape. We like the paints listed above because it works great for projects like these for little hands and for the correct amount of paint.

C. Activity
Fold the piece of paper over and use your hands to press down on the paint to make it spread to the other side. Open it back up to see how it looks! You can always add more paint and do the process again if you don’t like the shape.
Then, create a stem and leaf for the pumpkin and paste those on using a glue stick.
Lastly, make a face for your pumpkin out of black paper and just lay it down on the wet paint! It will stick!
#4: Noodle Pumpkins
This cute pumpkin craft is great for all ages! This one is great for Halloween, Thanksgiving, or a fall-themed craft.
I love the use of different noodles for this craft too. It was fun using the wheel pasta.

How to do this activity
A. Materials you need
- cardboard/paper
- acrylic paint
- ziplock bags
- parchment paper
- art trays
- googly eyes
- glue
- pasta (wheel and spiral)

B. Set-up
You can either paint the pasta noodles by hand or place them inside a ziplock bag with some acrylic paint and shake it up. Then, dump out the pasta on parchment paper to let it dry.
The wheel pasta won’t be completely covered with this method because of all the holes in the pasta, so you may have to hand-paint the spots it missed!
Then, you can paint the spiral noodles for the leaves of the pumpkins.
While the pasta is drying, you can draw and paint the pumpkins! Add googly eyes and a funny face to each one.
C. Activity
Once the pasta is dry, add a small amount of glue to the noodle and stick it down to the pumpkin around the face you created.
Then, glue down the leaf next to the stem you drew!
How cute and fun is this sensory fall craft for kids?
RELATED: Sensory Activities for Kids
#5: Fingerprint Pumpkins
We made these fingerprint pumpkins last year, and they turned out so cute.
It’s so much easier to do these pumpkin crafts with the kids instead of carving them!

How to do this activity
A. Materials you need
- pumpkins (real or fake)
- acrylic paint
- acrylic paint markers
- paint tray
B. Set-up
Grab your supplies and put the paint in a paint tray.
C. Activity
Your kids will dip their fingers into the paint and make prints all around the pumpkins.
We made spiders and ghosts. You can also make little pumpkins by using orange paint!
Once the prints have dried all around the pumpkin, use an acrylic paint marker to add the details.
For the ghosts, you’ll add eyes and a mouth; the spiders will need 8 legs, and if you made pumpkins, add a stem and a leaf.
#6: Paper Pumpkin Crafts
These paper pumpkin crafts are fun and easy for all ages!
I love the different ways you can use paper to create pumpkin shapes!

How to do this activity
A. Materials you need
- colored paper
- scissors
- glue stick
- glue
B. Set-up
If you are choosing to do the paper strip crafts, cut strips of orange paper! This will work for both the long paper strip pumpkins and the looped paper pumpkins.
For the ripped paper pumpkin craft, have the kids rip small pieces of orange paper.
C. Activity
In the top first photo, you can see that we set up the strips in a circle shape to make the pumpkin. Use a glue stick to attach the pieces to a black piece of paper.
For the looped paper pumpkins, take the two ends of the paper strips and paste them together with a glue stick and glue them down in a circle shape.
Lastly, for the ripped paper pumpkins, use a glue stick to stick the pieces down in a pumpkin shape!
Once you have that done, add on paper eyes, a nose, and a mouth. If you choose to do the looped paper pumpkins, you can’t add a face easily, so we chose to leave it blank.
Create a stem and leaves for the pumpkins, and you have such a cute pumpkin craft!
RELATED: Spider Crafts
#7: Fork Print Halloween Crafts
Here’s an art idea that is so much fun! Not only is this a pumpkin craft idea but also some other fun Halloween characters.
We made a black cat, a pumpkin, and Frankenstein.

How to do this activity
A. Materials you need
- forks
- acrylic paint
- cardstock paper
- scissors
- glue stick
- pom
- glue
B. Set-up
Add your paint to a paper plate to make it easy to dip the fork in the paint!
C. Activity
Trace a bowl on cardstock paper to get a perfect circle shape! This will make it easy for your kids to know where to make the prints.
For Frankenstein, create a head shape out of green paper (a square) and semi-circles for the ears.
They dip the fork in the paint and make prints all around the circles or on top of the head for Frankenstein.
After all the prints are made, you can add the details! The cat has paper ears, paper whiskers, and a pink pom.
Frankenstein has paper eyes and some marker detail on the face. Lastly, the pumpkin needs eyes, a nose, a mouth, and a stem!
#8: Pumpkin Seed Craft
What do you do with all those pumpkin seeds after you carve your pumpkin? We eat many of them, but sometimes we have WAY too many.
I decided to use them for a pumpkin craft, which turned out so cute!

How to do this activity
A. Materials you need
- cardstock paper
- acrylic paint
- pumpkin seeds
- glue
- googly eyes
- Sharpie
- plastic bag
B. Set-up
Have the kids add some pumpkin seeds to a plastic bag and add a few squirts of acrylic paint. Shake it up and dump it out on parchment paper to dry. Make sure to spread them out on the parchment paper so they don’t stick together.
While waiting for the seeds to dry, draw and paint a pumpkin shape on paper. You can paint the stem and leaf as well on the pumpkin.
C. Activity
Glue on googly eyes and draw on a mouth to each pumpkin using a Sharpie when the pumpkin is dry.
Have the kids glue the pumpkin seeds to each pumpkin. Then, they can just use regular school glue to paste them onto the pumpkin.
This is such a cute and fun sensory Halloween craft for kids!
RELATED: Halloween Crafts for Kids
#9: Salt Painted Halloween Crafts
Salt painting is one of my favorite art activities to do with the kids.
This salt-painting pumpkin craft is fun and easy!

How to do this activity
A. Materials you need
- cardstock paper
- salt
- glue
- watercolors
B. Set-up
Draw your pumpkin shape or other Halloween shapes on cardstock paper.
C. Activity
Outline the drawings in glue, then sprinkle salt all over the projects! This part can be messy, so make sure to have an art tray under the paper to control the mess.
Dump the extra salt onto the tray.
Then, use watercolors to paint the salt! Watch the colors flow through the salt. It’s such a fun process.
This is not meant as a keepsake craft; it’s more for a process art activity. If you want to keep this for as long as possible, place it inside a sheet protector and hang it up.
RELATED: Painting Ideas
#10: Sponge Print Halloween Crafts
Sponges are a great craft supply for kids to create with. They are easy for the kids to hold, and the projects turn out too cool!
This pumpkin craft is simple and fun for kids. Also, check out the other prints we made!

How to do this activity
A. Materials you need
- sponge
- scissors
- white paint
- googly eyes
- black card stock
- glue
- black acrylic paint marker

B. Set-up
Make a ghost shape on a sponge and cut it out using scissors.
C. Activity
Have the kids paint white paint onto the sponge and make prints on black paper. The kids shouldn’t dip the sponge into the paint-this method works, but sometimes there can be too much paint on the sponge, and it won’t make the best shape.
You can make as many prints as you want on the paper! Then, have the kids glue googly eyes onto each ghost and make a mouth using a black acrylic paint marker!
This is such a simple and fun ghost craft for preschoolers and toddlers
#11: Pom Print Halloween Crafts
Use poms like a paintbrush to create these fun pumpkin crafts and other ideas!
We made a ghost, pumpkin, and candy corn. Each one was fun and easy to make.

How to do this activity
A. Materials you need
- craft poms
- clothespins
- cardstock paper
- acrylic paint
- googly eyes
- glue stick
- paint tray
B. Set-up
Create the shape you want for your kids to paint using a pencil on the paper. This will make it easy for the kids to know where to paint.
C. Activity
Attach a craft pom to some clothespins to make their paintbrush.
They will dip the pom in the paint and make prints all over the outline you drew.
For the ghost, they will add on googly eyes and pink cheeks!
The jack-o-lantern will need eyes, a nose, and a mouth.
Lastly, the candy corn doesn’t need any details. Just a few fun different colors. What a fun and simple Halloween craft.
#12: Pumpkin Paper Plate
Here’s a simple pumpkin craft that’s wonderful for kids of all ages.
Try this pumpkin craft at your child’s Halloween party.

How to do this activity
A. Materials you need
- paper plate
- construction paper
- scissors
- glue stick
B. Set-up
Have the kids start ripping up small pieces of orange construction paper.
C. Activity
They will paste the pieces on the back of a paper plate! Try to cover as much as they can so it looks like a pumpkin.
Then, create a square piece for the stem and paste it on the back of the plate.
Trace your child’s hand and use that as the leaf for the pumpkin. Or, if you don’t want to do that, just create a leaf shape out of paper.
Lastly, make a face for the pumpkin using black construction paper!
RELATED: Fine Motor Activities
#13: Pumpkin Cutting Craft
This pumpkin craft is PERFECT for toddlers and preschoolers. It’s a simple and fun way to practice scissors skills.
It also makes for a cute Halloween craft! I love the faces on the pumpkins.

How to do this activity
A. Materials you need
- construction paper
- marker
- scissors
- glue stick
- foam pumpkins (optional)

B. Set-up
Draw a pumpkin shape on construction paper and cut it out. To make these pumpkins, I just traced one of the foam pumpkins we had.
C. Activity
We drew the faces on the pumpkins using a marker! This is a great way for your kids to practice drawing shapes.
Then, create lines for them to cut on at the top of each pumpkin (like they are carving the top of the pumpkin).
Cut out a small rectangle on brown paper for the stem of each pumpkin and paste it on the back.
Have the kids cut on the lines of each pumpkin! What a fun Halloween activity.
RELATED: Halloween Party Ideas
#14: Fingerprint Resist Pumpkins
Here’s a simple pumpkin craft that is great for toddlers and preschoolers.
Try this pumpkin fingerprint-resist craft. It’s so fun with all the Halloween colors!

How to do this activity
A. Materials you need
- cardstock
- acrylic paint
- scissors
- glue stick
- masking tape
B. Set-up
Create a pumpkin shape out of paper and tape it to another sheet of cardstock paper (white, orange, or black).
C. Activity
The kids will dip their fingers in paint and make prints all over the sheet of paper and around the pumpkin shape.
Depending on what color paper you use, you can use different colored paints!
Make sure to make prints all around the pumpkin shape, so it shows up when you peel it off.
Once all the prints are made, they can slowly peel up the pumpkin shape to reveal what it looks like underneath!
Add paper eyes, a nose, and a mouth for the jack-o-lantern! What a cute Halloween craft.
#15: Foil Painting Crafts
Foil painting is one of my favorite painting techniques to do with the kids. They love hearing the foil make sounds as they paint.
This pumpkin craft is so easy to make! It’s also a great way for kids to learn how to stay in the lines.

How to do this activity
A. Materials you need
- foil
- hot glue
- acrylic paint
- paintbrushes
B. Set-up
Create your ghost shape or other Halloween shapes using a pencil on foil first. Then use a hot glue gun to outline the drawings.
C. Activity
Have the kids use acrylic paint to paint inside the lines of the hot glue that you created. The ghost one is really easy!
You’ll just need white and black paint to paint the ghost and the facial features. The pumpkin and spider web have different colors and are super fun to create too!
RELATED: Painting Ideas for Kids
#16: Mickey Painted Pumpkins
This Halloween pumpkin craft is TOO cute and fun to make for the season. We LOVE Mickey.
Painting pumpkins is more fun than carving them, if you ask me.

How to do this activity
A. Materials you need
- craft pumpkins/real pumpkins
- acrylic paint
- cardstock
- hot glue
- poms
- Q-tips
- yarn

B. Set-up
Create a Mickey pumpkin by painting the top of the pumpkin black and the bottom red. Then, wait for it to dry!
C. Activity
Create Mickey ears out of black cardstock paper by drawing semi-circles on cardstock paper.
Have an adult hot glue the ears down on the pumpkin. I bent the bottom of the paper so it would sit on the sides of the pumpkin.
Lastly, hot glue poms or buttons at the front where the red and black paint meets to make Mickey!
#17: Paper Plate Pumpkin
Looking for a simple pumpkin craft to do with your toddlers and preschoolers?
Try this pumpkin craft paper plate! It turns out cute, and it’s great for kids to create.

How to do this activity
A. Materials you need
- paper plate
- orange paint
- brown paper
- glue stick
- green pipe cleaner
- tape
- black paper
- scissors

B. Set-up
Paint the paper plate orange and wait for it to try. This will take a little bit, but while waiting for it to dry, you can create the pieces you need for the pumpkin.
You’ll need to make shapes for the pumpkin’s eyes, nose, and mouth. Your kids can help with this step and work on scissor skills by cutting the shapes out!
Also, create a square shape for the pumpkin’s stem out of brown paper.
C. Activity
Once the paper plate is dry, paste on the pieces to create the pumpkin’s face using a glue stick. Then, glue the stem onto the back of the paper plate.
Cut a green pipe cleaner in half and twist is around your finger. Pull it off and have the kids tape it on the back by the stem!
RELATED: Paper Plate Crafts for Kids
#18: Wine Cork Pumpkins
I love making DIY crafts that can be used as decor around the house. This pumpkin craft is perfect for keeping up all fall season!
My daughter and I made this together, which was SO fun. I typically just set up crafts for them, so it was a fun mommy-and-me project!

How to do this activity
A. Materials you need

B. Set-up
Start by painting the wine corks orange. We used a dark orange and a light orange. I like that there were mixed colors! Also, paint a few brown for the stems.
Wait for these to dry; it won’t take long! I think it took like 15 minutes for them to be completely dry.
C. Activity
The adult will hot glue the wine corks together in a pumpkin shape. We made big ones and little ones.
Then, hot glue the stem onto the back of the pumpkin.
The kids can practice tying skills when they tie a piece of twine onto the stem in a bow. Lastly, grab some leaves from outside or use artificial leaves and hot glue them down on each side at the top.
Place them around your house! What a fun family pumpkin craft!
#19: Pumpkin Name Craft
Here’s a fun way for kids to work on name-building skills. This pumpkin craft is great for toddlers and preschoolers.
I love this simple paper craft for kids. It’s great to do at home or in the classroom this Halloween!

How to do this activity
A. Materials you need
- paper
- glue stick
- scissors
- marker
- foam stickers
B. Set-up
You’ll make the number of circles for your little one’s name for the pumpkins on orange paper. Then, you’ll make the same amount of stems on brown paper.
Your kids can cut these pieces out or even create them independently if they can draw shapes!
C. Activity
You’ll also create a fence for the background. Draw some rectangle shapes for the fence and paste them down onto the black paper.
Then, have your little one write the letters of their name on the pumpkins. You can also do this step yourself if your kids aren’t practicing handwriting skills just yet. Then, attach the stems to the pumpkins using a glue stick.
They will paste them in order on the paper! Then, add fun stickers to the background or even create a moon shape.
RELATED: Easy Preschool Activities
#20: Pumpkin Sponge Craft
The kids love when we do sponge painting activities. The sponges make cool prints, and it’s easy for them to do.
This pumpkin craft for kids is easy and turns out super cute.

How to do this activity
A. Materials you need
- sponges
- scissors
- cardstock paper
- paint
- masking tape

B. Set-up
Cut a sponge into 4 rectangular shapes using scissors. Then, create a pumpkin shape on paper, cut it out and use masking tape to tape it onto orange paper.
C. Activity
Have the kids dip their sponges into black paint and make prints around the paper, some around the pumpkin shape. Repeat this with purple and green too!
When they are done making prints, peel off the pumpkin shape to reveal what it looks like underneath! You can leave it as is or make a face for the pumpkin using a black marker.
#21: Ripped Paper Pumpkins
I have another cute and fun pumpkin craft for toddlers and preschoolers! Plus, this is a FREE printable!
Practice some fine motor skills by doing this fun ripped paper pumpkin activity.

How to do this activity
A. Materials you need
- construction paper
- glue stick
- FREE printable
Click HERE for your FREE Ripped Paper Pumpkins
B. Set-up
Print off your free printable!
C. Activity
Your kids will rip orange construction paper into small pieces. Then, they will use a glue stick to paste them onto the pumpkin.
If you don’t want to make this a ripped paper craft, you can also have them color the pumpkin, use scrunched tissue paper or dot markers!
Have them write their name at the bottom and give this to someone special for Halloween!
RELATED: Seasonal Printable Resources
#22: Alphabet Pumpkins
Here is a great Halloween craft and learning activity for your kids! This is a fun way for kids to practice the alphabet.
I love simple learning set-ups for kids. All you need is a few supplies you most likely have right at home!

How to do this activity
A. Materials you need
- cardstock paper
- markers
- clothespins
- poms
- washable paint

B. Set-up
Draw a few rows of pumpkins on a vine on a piece of cardstock paper.
Write the letters of the alphabet in each pumpkin.
C. Activity
The kids will attach a craft pom to a clothespin and dip the pom into the orange paint.
The adult will ask the child to find a specific letter, and they will use the pom to paint the inside of that pumpkin! This will continue until all the pumpkins are colored in with the paint.
This is a great way for kids to review the letters of the alphabet in a fun and creative way!
RELATED: Alphabet Activities for Preschoolers
#23: Paper Bag Pumpkins
How cute is this pumpkin craft? It’s SUPER easy too! It makes for adorable decor as well for your porch or inside your house!
Kids will love making this simple craft for fall or Halloween! This is a fun one you can even do at a kid’s Halloween party.

How to do this activity
A. Materials you need
- paper bags
- paint
- paintbrush
- twine
- newspaper
- pipe cleaners
B. Set-up
Stuff your paper bag with newspaper. You want to fill it about halfway full with newspaper. Then, scrunch the bag, so it looks like a pumpkin shape and a stem.
You will separate the two parts by tying a piece of twine in a bow.
C. Activity
The kids will paint the bottom of the pumpkin orange, and they can paint the stem green, or they can leave it blank.
Curl a green pipe cleaner around your finger and wrap it around the twine. You can add one or two pipe cleaners.
You can choose to add a face for the pumpkin out of black card stock paper, or you can leave them blank.
#24: Pumpkin Seed Counting
Here’s a great way to make a pumpkin craft and get some learning in!
I love the pumpkin seeds for this craft activity. It’s such a fun way for the kids to practice counting.

How to do this activity
A. Materials you need
- cardboard/orange cardstock
- paint (optional)
- pumpkin seeds
- glue
- markers
- box cutter
B. Set-up
Draw and cut out pumpkins on a piece of cardboard. If you don’t want to use cardboard, you can just use orange cardstock paper!
Once you have the pumpkin shape, cut it down in the center.
C. Activity
Write a number on one side of the pumpkin. Then, have a bowl of pumpkin seeds ready for the kids.
They should tell you the number on the side of the pumpkin before they begin counting. Then, they will individually count out the pumpkin seeds and glue them onto the cardboard/paper.
These can be kept for tactile learning and counting boards! This is such a fun fall craft and activity.
RELATED: How to Teach Your Toddler Numbers
#25: Muddy Pumpkin Patch Sensory
So in real life, a muddy pumpkin patch would be something no one would want to go through.
But this is a fantastic sensory activity for kids in the play world! My kids loved pretending they were picking on their favorite pumpkins at the pumpkin patch!

How to do this activity
A. Materials you need
- brownie mix
- candy corn pumpkins
- spoons
- bowls
- sensory bin

B. Set-up
Dump the brownie mix into a sensory bin and add a bunch of candy pumpkins in rows.
C. Activity
Let the kids use spoons and bowls to play with the pumpkins and the brownie mix. Have them pretend to be at the pumpkin patch picking out their pumpkins! To make this super muddy, add water to the brownie mix. The kids will love this addition to the activity!

I do suggest doing this activity outdoors. It can get messy, and their little hands get quite dirty! But it’s fun and festive for the holiday!
#26: Wood Slice Pumpkins
These pumpkin wood slices are simple, easy to make, and work as the cutest DIY decoration.
I also love that this craft can be done by all ages! This is a great pumpkin craft for kids and adults!

How to do this activity
A. Materials you need
- wood slices
- acrylic paint
- twine
- hot glue
- wine corks
- foam paint brush
- scissors
- artificial leaves
- black acrylic paint marker (optional)

B. Set-up
You’ll use orange acrylic paint to paint the wood slices! We painted almost the entire front of the wood slice, leaving a little around the edges.
C. Activity
Hot glue a wine cork to the back of the wood slices for the pumpkin’s stem. Then, tie a piece of twine around the top of even some fall bows.
We used real leaves from outside, but you can also use artificial leaves and hot glue those to the top of the wood slice.
You can leave them as is and stand them up for some cute fall decor, or you can also add some faces using a black acrylic paint marker!
#27: Halloween Popsicle Stick Crafts
These Halloween craft sticks are simple and fun to make.
It just took a few minutes to make these! They are great for a Halloween kid’s party!

How to do this activity
A. Materials you need
- popsicle sticks
- paint
- markers
- googly eyes
- pipe cleaners
- masking tape
- glue
B. Set-up
The kids will paint the popsicle sticks! Depending on which one you want to make, you’ll need purple, green, orange, or white paint. You need 5 sticks for each one.
C. Activity
Once the sticks are dry, line them up and tape them together on the back so they will stay together. you may need a few pieces of masking tape.
Then, you’ll glue on googly eyes, draw on features, or wrap a pipe cleaner around the sticks!
#28: Halloween Lava Lamps
These Halloween-themed lava lamps are great because they are a pumpkin craft and a science activity!
Love how fun and easy these are to make. My kids love them each time we make them.

How to do this activity
A. Materials you need
- jars
- baby oil
- Alka Seltzer
- acrylic paint
- water
- dry erase marker
- hot glue
- googly eyes
- small pink craft pom
- cardstock paper
B. Set-up
Create your Halloween characters on jars using a dry-erase marker! We made a pumpkin, Frankenstein, a ghost, and a black cat.
You can use a hot glue gun to add on googly eyes, and they will come off without staining the glass jar.
We also glued a pom for the nose on the cat and paper ears.

C. Activity
Fill up jars 1/2 way with baby oil or vegetable oil. We like to use baby oil because you can see the colors more clearly.
Then, in a bowl, mix a few squirts of acrylic paint and a touch of water. For the pumpkin, we used orange, Frankenstein green, the ghost white, and the cat black.
Dump the mix of paint and water in the jars. Then, once you are ready, you can break up an Alka Seltzer tablet and place them in.
Watch the reactions happen like a lava lamp! The reaction happens for a few minutes, but you can always add more in to keep the experiment going.
RELATED: Kid’s Science Experiments
#29: Outdoor Bag Lanterns
Make these fun paper bag lanterns as a Halloween decoration. These are perfect to have out for trick or treat.
Make a pumpkin craft, or also make a ghost and Frankenstein!

How to do this activity
A. Materials you need
- paper bags
- acrylic paint
- googly eyes
- tea lights
B. Set-up
Paint the paper bags orange, white and green. Use acrylic paint to create these so the colors turn out bold!
C. Activity
Once the bags are dry, you can make the face for the pumpkin, ghost, and Frankenstein.
We used a black acrylic paint marker to add the details for each one. Also, we added googly eyes for Frankenstein.
Add a tea light to each lantern and watch them light up at night!
#30: Halloween Windsock Craft
Looking for a pumpkin craft that can work as a decoration for outside? This pumpkin craft is ADORABLE and so fun to watch.
I love crafts that can work as decor around the house as well. The kids love seeing their artwork displayed.

How to do this activity
A. Materials you need
- toilet paper rolls
- acrylic paint
- pom-pom
- paintbrush
- streamer
- scissors
- pipe cleaners
- hot glue
- window hanger
- art tray

B. Set-up
Paint a toilet paper roll with orange acrylic paint and wait for it to dry.
C. Activity
Add a pumpkin face using black paint or a black acrylic paint marker.
Then, hot glue some green and orange streamer onto the bottom of the roll. Also, glue some twine or a pipe cleaner at the top of the roll so it can hang outside!
Place a window hanger outside and hang it up! Then, watch it blow in the wind!
RELATED: Spring Crafts for Kids
#31: Lifecycle of a Pumpkin Freebie
Grab my pumpkin learning pack for free!
Inside this pack are free pumpkin crafts to learn about the parts of a pumpkin and its lifecycle.

How to do this activity
A. Materials you need
- markers
- crayons
- stapler
- scissors
- glue stick
Click HERE for your FREE Lifecycle of a Pumpkin pack
B. Set-up
Print off the activities that you want to do with the kids! There are three activities included. A lifecycle of a pumpkin craft, the lifecycle of a pumpkin book, and parts of a pumpkin cut and paste activity.
C. Activity
Kids will practice cutting and pasting skills while they are learning about the lifecycle of a pumpkin and parts of a pumpkin.
Kids can also color the lifecycle of a pumpkin book and then staple it together to make their own mini-book!
#32: Pumpkin Pour Craft
Looking for a fun way to paint your pumpkin this year?
Try this pour method! It turns out so cool, it’s such a fun process and it’s a great pumpkin craft!

How to do this activity
A. Materials you need
- pumpkin
- acrylic indoor/outdoor paint
- table cloth
B. Set-up
We used a fake pumpkin for this activity, but you can also use a real one. Gather your pumpkin, a plastic table cloth, and your paint!

C. Activity
This is a really easy project. The kids will just open up the top of the acrylic paint and squirt the colors all around the pumpkin.
There’s no wrong way to do this, it will turn out so cool no matter where the colors end up.
Start at the top of the pumpkin to let the paint drip down to the bottom! This does take awhile to dry- leave it outside or inside on an art tray to dry.
RELATED: Painting Ideas
#33: Pumpkin Activity Pack
Here’s a fun and free pumpkin activity pack. Work on tracing, cutting, reading, colors, shapes and more with this pumpkin pack.

How to do this activity
A. Materials you need
- markers
- crayons
- construction paper
- glue stick
- pencil
Click HERE for your FREE pumpkin activity pack
B. Set-up
Print off the pages you want to work on with the kids.
C. Activity
Use this pumpkin-themed activity pack in the classroom or right at home with your kids to work on tracing, cutting, reading, colors, shapes, a pumpkin investigation, and a craft template.
This is such a great packet for fall learning. No prep is needed either!
#34: Cup Pumpkin Lanterns
I have a simple pumpkin craft that is perfect for outdoor or indoor decor around the house!
Your kids will love making these simple lanterns, and they will love seeing them glow at night.

How to do this activity
A. Materials you need
- plastic cups
- acrylic or washable paint
- googly eyes
- white streamer
- hot glue
B. Set-up
Paint your cups the color you want! We made an orange pumpkin, a white ghost, a white mummy, a purple monster, and a green Frankenstein.

C. Activity
You only need one coat because you want to see the light shine through it, so a thin layer of paint is just fine.
When making the pumpkin or ghost, add some black paint for the face. When creating the monster, Frankenstein and mummy, hot glue googly eyes on them.
Then, the mummy can have added white streamer wrapped around it. You can just tape the streamer on or hot glue it if you want to make sure it’s more secure.
Add a tea light under the cup and see them light up at night!
#35: How to Carve a Pumpkin
I have a free pumpkin learning pack for you!
Included in this pack is a how to carve a pumpkin mini book, a cut-and-paste activity, and building your own jack-o-lantern sheet.

How to do this activity
A. Materials you need
- crayons
- markers
- stapler
- scissors
- glue stick
Click HERE to get your Free How to Carve a Pumpkin Pack
B. Set-up
Print off the pages of the resource that you want to do!
C. Activity
If you want to do the mini book, cut out the pages of the book and have the kids color the pages! Then, place the pages in order of how to carve a pumpkin and staple the book together.
Then, there is a cut-and-paste activity. Have the kids cut out the images at the bottom of the page and paste them in order of how to carve a pumpkin.
Lastly, there is a design for your jack-o-lantern activity. They can draw the design they want on the pumpkin and color it in. Then, they will answer the questions.
Final Thoughts and Conclusion
I hope you found some pumpkin crafts that you can try with your kids this Halloween!
Pumpkin crafts are perfect for making for the fall season. They are easy and fun.
Happy Halloween
Deena